Setup
SendGrid Account Setup
To use this plugin you will need a SendGrid account. SendGrid provide a variety of plans for different volumes of sending. The Lite plan is not supported by this plugin but all other plans are, including the free plan which provides 12,000 free emails per month.
After creating an account you'll have to wait for your account provisioning to complete before you are able to send email.
SendGrid Configuration
Credentials
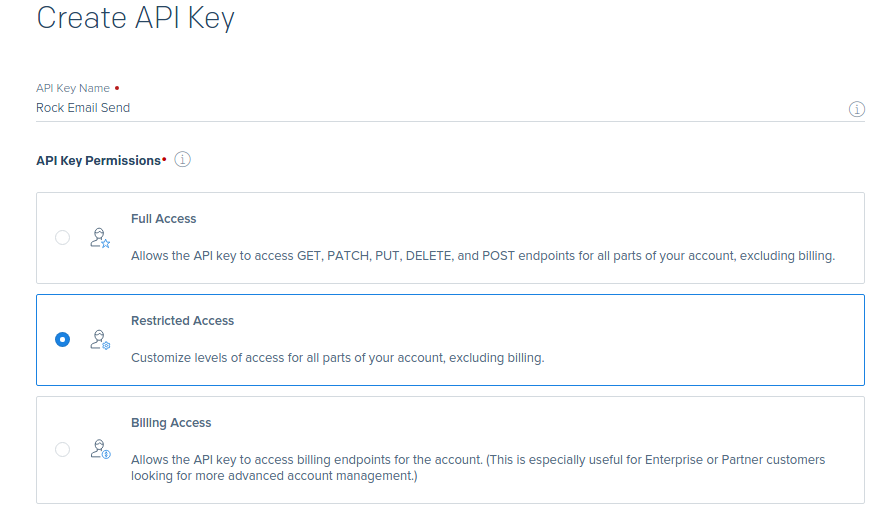
To send emails from Rock you'll want to configure a separate credential from the one you use to login to the SendGrid dashboard. To do this, from the SendGrid dashboard, go to Settings > API Keys and then create a new API Key. Give it a sensible name (like: Rock Email Send), and tick Restricted Access.

Ensure that the API key has full access to Mail Send and then press Create and View at the bottom of the page and note down the API key displayed to you. You'll need to enter this into Rock later.

Analytics
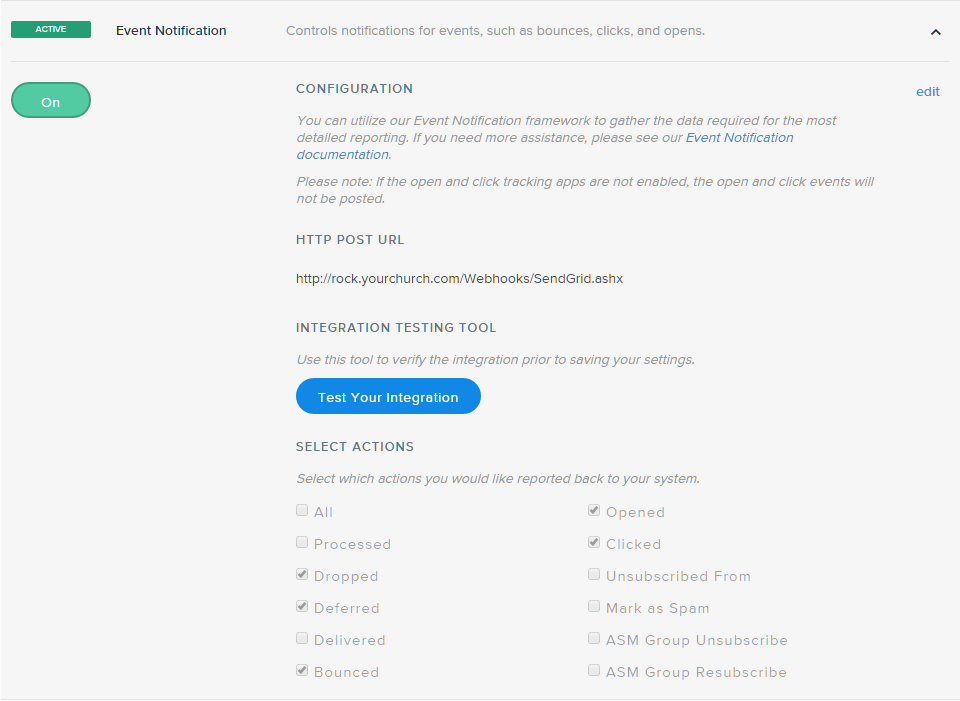
SendGrid Email Transport supports email analytics, configuring this is a two step process. First visit Settings > Mail Settings on the SendGrid dashboard and switch Event Notification on. In the HTTP Post URL box type in your Rock URL followed by /webhooks/SendGrid.ashx. For instance if my Rock site was hosted at http://rock.bricksandmortarstudio.com I'd type in http://rock.bricksandmortarstudio.com/webhooks/SendGrid.ashx. Ensure you select the following actions:
- Opened
- Clicked
- Dropped
- Deferred
- Bounced

If you want to track opens and clicks within your emails you will also need to enable tracking. From the SendGrid dashboard visit Settings > Tracking and switch Click Tracking and Open Tracking on.
![]()
Whitelabels
To ensure the best possible delivery you'll need to configure whitelabels (Settings > Whitelabels) for the domain(s) you wish to send mail from. This will involve changing DNS records on those domains and so consequently you may need to help of your network administrator. SendGrid make the process very easy and have a great video to help you get setup.
Rock Configuration
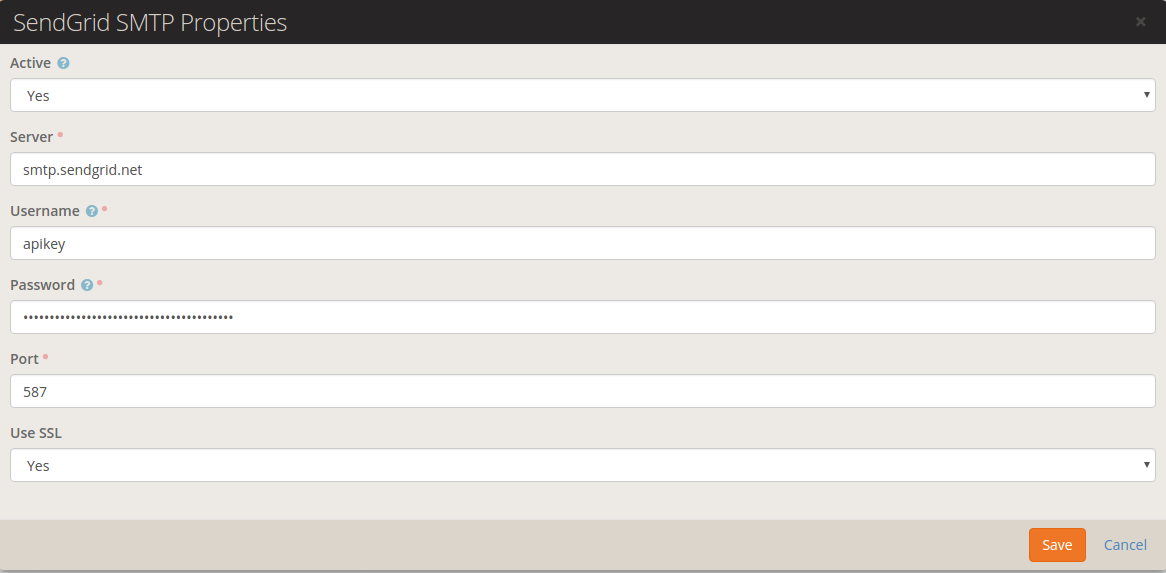
Configuring Rock to use SendGrid to deliver your emails is painless. Visit Admin Tools > Communications > Communication Transports > SendGrid SMTP. Here you'll find the options for configuring SendGrid. Most of the default options here won't need changing (in fact altering the server from smtp.sendgrid.net is a bad idea!) but you will need to put in values for the username and password. Username is apikey and the password should be the API Key you created on the SendGrid dashboard earlier. After entereing those set the transport to Active and press Save.

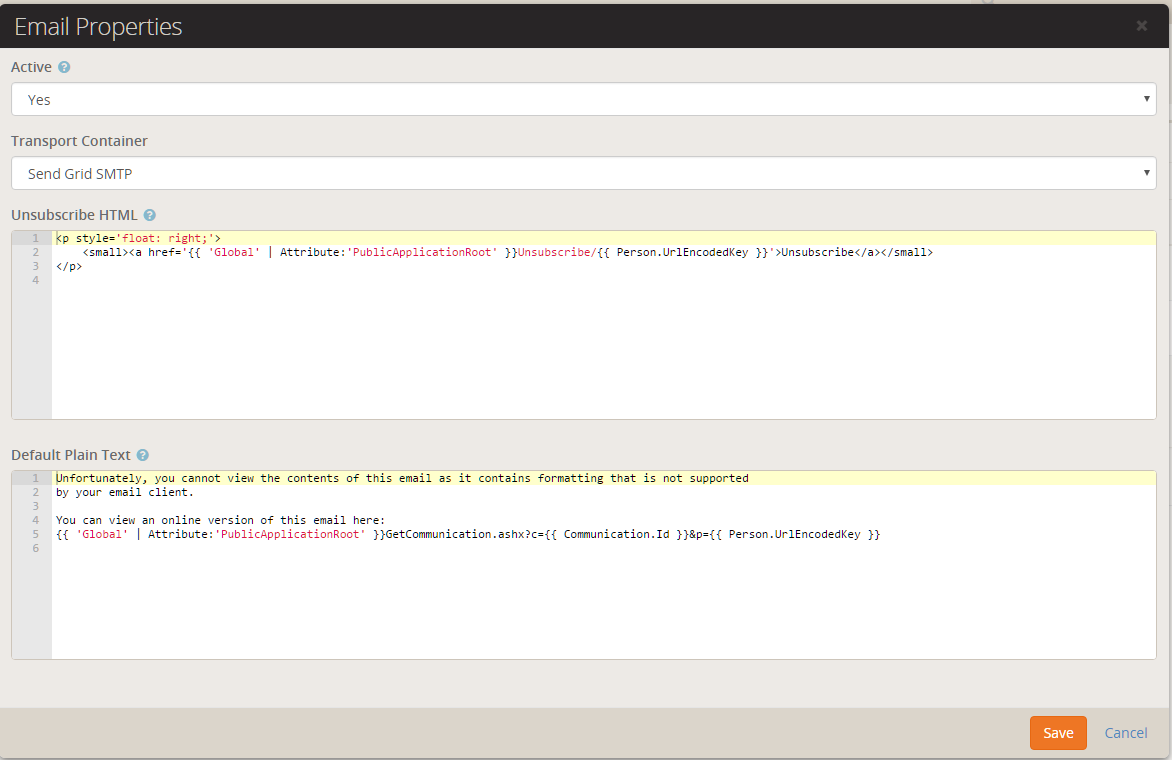
Then you'll need to go to Admin Tools > Communications > Communication Mediums > Email and switch the Communication Transport to SendGrid SMTP.

Developers
The source code for the SendGrid Email Transport is available here for use with the Rockit SDK
.